Written by Elizabeth
Edited by Hope E. Davis

Sourdough bread has always been worth the effort for me but what if the effort was cut to
a place where you needed no special skills or time to turn out an amazing loaf of
sourdough?
Traditional sourdough is labor intensive and requires a huge time commitment. It also
requires various equipment that isn’t standard in the normal kitchen. I love
sourdough and was willing to go to these lengths to prevent me from eliminating bread
from my healthy lifestyle.
However, Imagine my surprise when
I learned I didn't need to babysit it
for 6-8hrs the day I made it! It relies on the natural formation of gluten over time as opposed to manipulation. The recipe and techniques outlined below will create amazing sourdough bread. My family loves it and it’s so much simpler than traditional sourdough
What is Sourdough Bread?
Sourdough bread is a white bread known for its unique and spongy consistency. Once popular in the streets of San Francisco, it is now available in most stores. But, like anything, it's best when you make your own!
What is the Difference Between Normal Bread and Sourdough?
While regular bread is leavened with packaged yeast, sourdough bread is leavened with Lactobacillus bacteria and wild yeasts. This mixture of bacteria and wild yeast is called a sourdough starter. It's made by mixing flour and water and letting it sit until microbes move in and ferment it. (ref#1)
While it is true that sourdough is harder to make than bread made with commercial yeast (instant, active dry, or fresh), it is not overly complicated. There are a variety of variables and processes to be aware of, but with the right beginner recipe, sourdough is accessible to almost any skill level, regardless of the number of baking utensils one has. (ref#4)
How to Make Sourdough Bread
If you have any questions, my email is rxhealtyhabits@gmail.com
Rx or Recipe: (Fun Fact: Rx means recipe in Latin)
Ingredients Needed to Make Sourdough Bread
12 oz filtered water
4 oz by weight active starter
.75 oz by weight salt
1 pound 4 oz high gluten bread flour
Expert Tip for Making Sourdough Bread
While the traditional approach requires keeping your starter alive in addition to being committed to six or so hours of tending to the different needs of this dough, this Dutch oven method requires only ten minutes or so of mixing the dough, then letting it rise for 12-24 hrs...that’s some latitude!
One day it got away from me, and I formed the ball and stuck it in the fridge overnight, let it come to room temperature, then baked it! This process is so much slowed down you can work around your schedule, not needing to be a slave to the bread.
Once the dough has risen for the prescribed 12-24 hours it gets formed gently, boule style, and settled into a proofing bowl loosely covered with a tea towel. Now it sits quietly for 2-4 hrs before we prepare it for baking.
Directions for Making Sourdough Bread
Step 1: Weigh Your Ingredients
First, I weigh all of my ingredients because the volume of the starter and the coarseness of salt
can throw off volumetric measurements and the salt/yeast ratio is critical to fermentation. Too much salt retards formation, too little and it can go too fast.
Place your bowl on your scale and “tare” off the weight of the bowl.
Step 2: Add Water
Add the water to the bowl then the starter, and mix to combine. ( Fun fact: if the starter is active it will float, if it’s sluggish it will sink, this will give you a peek into how the dough will prove.)
Step 3: Add Salt
Next, add the salt, stir, then add the flour. ( Note: I tare my bowl between each
addition to spare me the math.)
At this point, you will use a spoon or paddle to combine ingredients, roughly scraping the bowl as you go.
You do NOT need to knead this dough, you may need to give it a couple of squeezes, depending on your tools.
Step 4: Cover and Wait
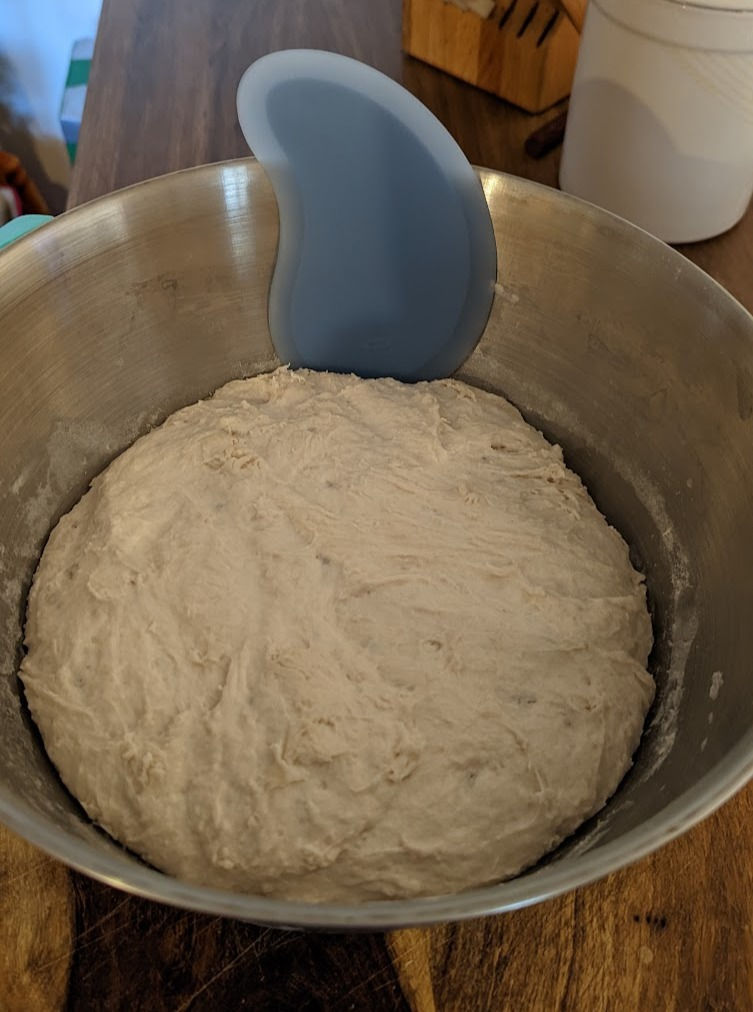
When combined, not smooth, just combined, it gets covered with plastic wrap or a
silicone lid like I have, then just walk away! If your starter was lively it may be
ready in 12 hrs, I give mine 24 generally unless I’ve just recently “fed” my starter.


Step 5: Shape the Bread
When you are satisfied that it’s ready to move on, gently scrape it onto a floured surface without deflating it. Using a boule-style movement of cupping the base of the dough, tighten the ball and drop it into a well-floured proof bowl. Here it will sit for another 4 hours or so.
Step 6: Bake
When the time comes, place your 3-4 quart Dutch oven inside of an oven and set it to 500 degrees. The 3 qt will give you a taller loaf, the 4 will spread out more, your choice.
Now comes the part that will drive everyone in your house crazy! Take the Dutch oven out and take the cover off.

I slash the top of the dough about six times, three times, then a 90-degree turn, and three more. I like the crusty edges that form.
With your dominant hand on the dough, turn the bowl over, dropping the dough into your hand then drop the dough into the dutch oven. Don’t worry, if it isn’t centered perfectly it doesn’t matter.
If it’s off give the pot a jig and it can be nudged more centrally. Place the lid on the pot, place the pot on the center rack of your oven and turn it down to 425 degrees.
Thirty minutes later, remove the lid from the pot and set your timer for another 15 minutes.
Step 7: Temperature Check
We are looking for 205 degrees for the internal temperature to call the loaf done, if you don’t have a thermometer, you should be able to tell from the appearance when the loaf is beautifully browned.
Once you have determined it is done, pull it from the oven and once again drop the bread into your dominant (mitted) hand and stand it against something that will allow the bottom to stay crusty and not steam.
Now your only problem is the people who have smelled this for the last 45 minutes and think they should be able to cut into this beauty. How you defend it is up to you, but it will need about an hour to be cool enough to cut into it without ruining it. Good luck!
FAQ
Making your own sourdough bread is worth the effort it takes to do so. From a cost
standpoint, it’s also a bargain. (if you don't want to make your own, you can pay a premium, up to $8, for a loaf from a fancy bakery or supermarket). But sourdough is also said to be far superior nutritionally to 'junk' or 'ultra-processed' packaged bread, due to the fermentation process. It’s so worth it! (ref#3)
Fun Fact: Did you know that sourdough is not only more flavorful but lower glycemic than regular bread? It still has plenty of carbs but it may be a better bread-in moderation of course. (ref#6)
Sourdough is a healthier alternative to regular white or whole-wheat bread. Although it has comparable nutrients, the lower phytate levels mean it is more digestible and nutritious. The prebiotics also helps to keep your gut bacteria happy, and they may be less likely to spike blood sugar levels. (ref #3)
Sourdough bread has a Glycemic Index of 54, which is much lower than regular white bread, at around 72-90. The reason sourdough bread is low GI is its long fermentation process which lowers its starch content. Sourdough can be considered in a low GI diet and is great at controlling blood sugar levels. But remember it still has a lot of carbs so Type 1 Diabetics be aware and adjust insulin dosing accordingly. (ref#5)
What gives sourdough its unique flavor?
Carbon dioxide is one byproduct of the fermentation process, which helps the bread rise to have a fluffy, airy texture. Lactic acid and acetic acid are also produced and are responsible for the complex flavors in sourdough bread. Lactic acid offers a more mild, tangy, yogurt-like flavor. (ref #2)
Sourdough bread will last for around 3 to 5 days if wrapped and stored correctly. But to enjoy sourdough at its best, it's recommended to consume it within 24. It also can be sliced and frozen if the loaf is too much to consume in 3-5 days.(ref #7)
Is Sourdough bread gluten-free?
Sourdough bread is, unfortunately, not gluten-free as it is made with a gluten flour.

I hope you don’t hesitate to give this sourdough technique a try. You will agree with us
that sourdough is your favorite bread especially since your own hands made it for your loved ones. They will want you to make it often so you may be creating a problem.
Buon Appetito!
Elizabeth Montemorano
References
Ref #1 https://www.healthline.com/nutrition/sourdough-bread#:~:text=While%20regular%20bread%20is%20leavened,move%20in%20and%20ferment%20it.
Ref #2 https://homesteadandchill.com/
Ref #3 https://www.dailymail.co.uk/health/article-8256553/That-home-sourdough-better-slice-Mothers-Pride.html
Ref #4
Ref #5
Ref#6
https://www.busbysbakery.com/glycemic-index-of-sourdough/
Ref #7
https://www.pantrymama.com/how-long-does-sourdough-bread-last/
Brought to you by RxHealthyHabits

Comments